Table of Contents
- Introduction
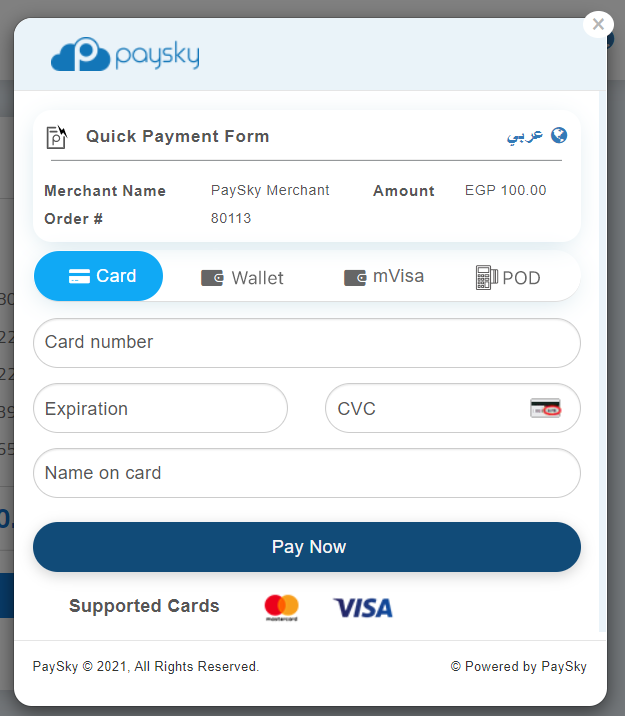
- Paysky - Lightbox
- What is Lightbox
- Installation Steps
- Install Woocommerce
- Upload the paysky Plugin
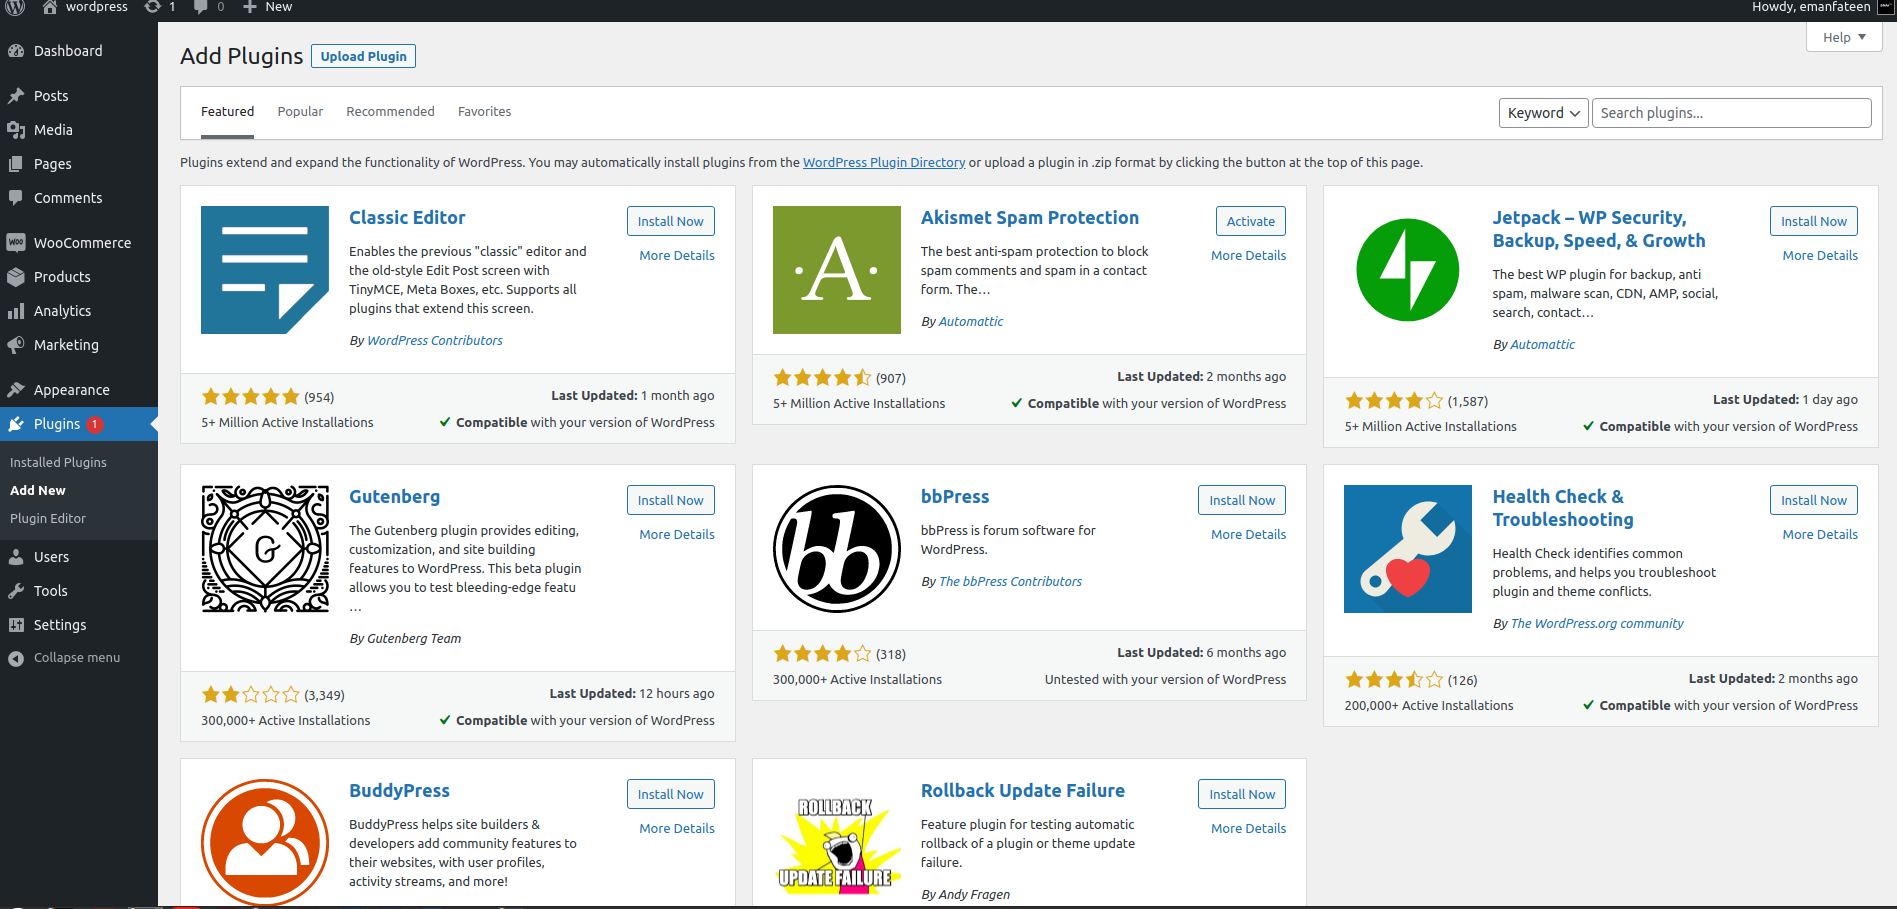
- Form plugins menu choose Add new
- At the top of the page click on Upload plugin
- Click on choose File and browse on the paysky.zip file Do not forget we need to upload paysky plugin as compressed file not as a folder
- After upload the plugin click on Install now
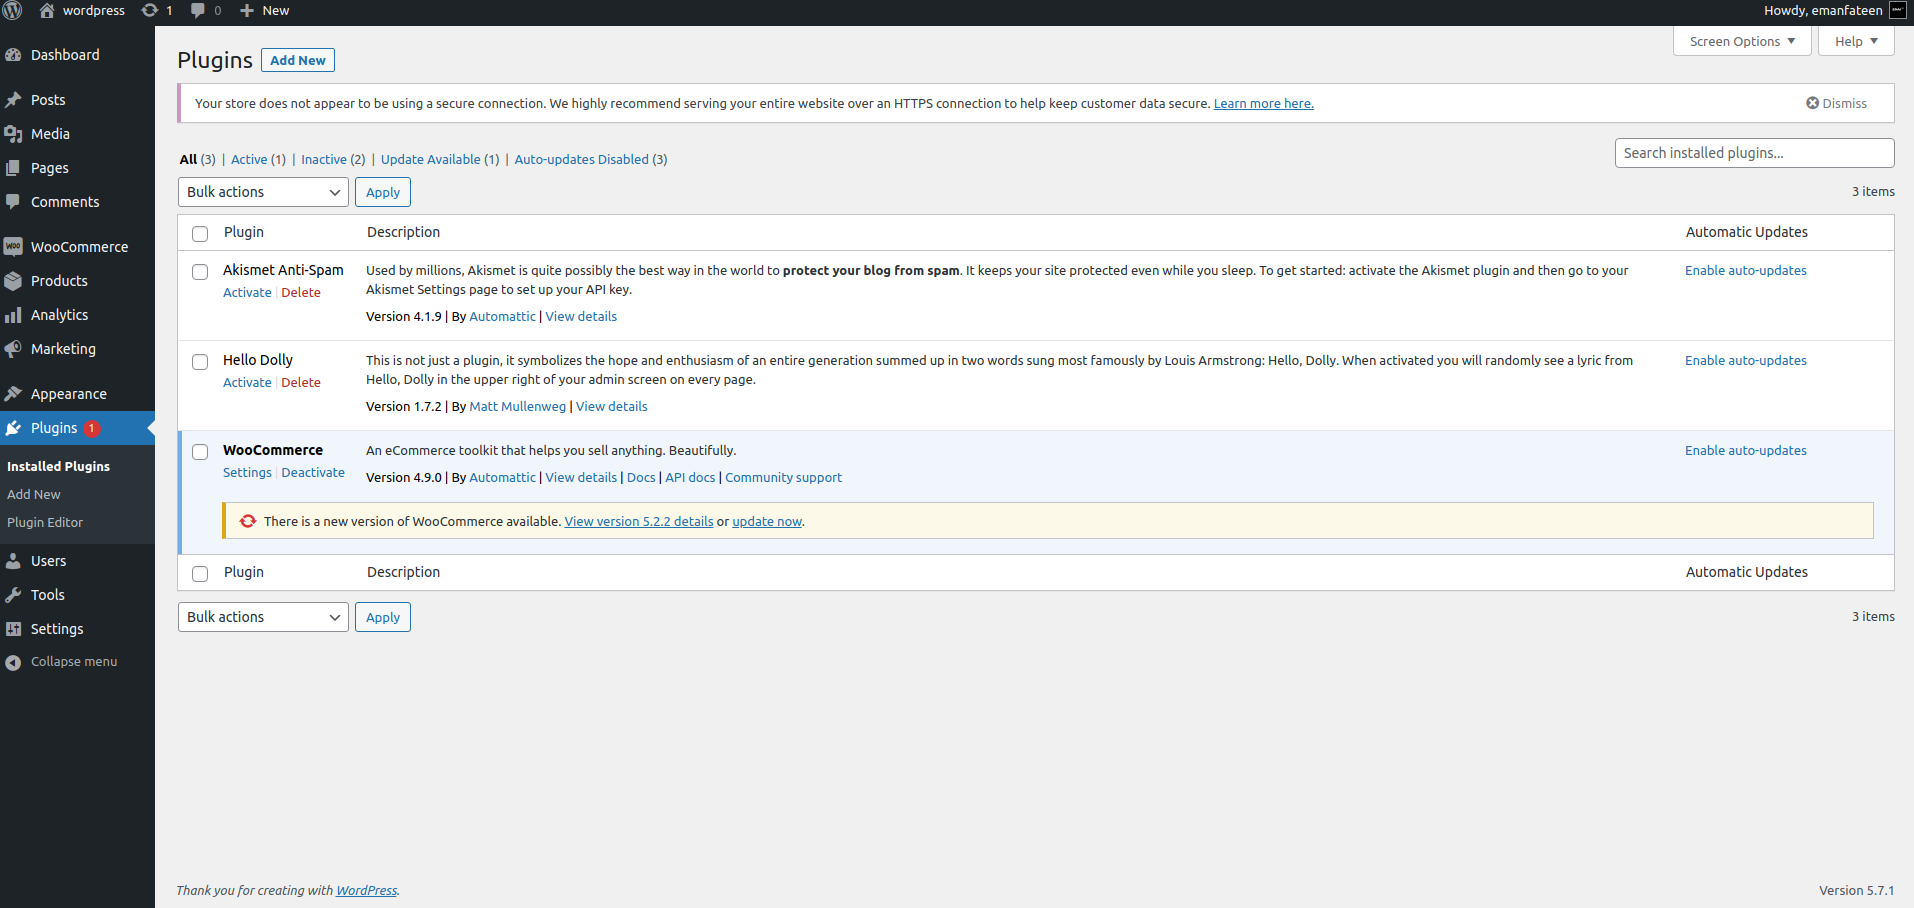
- It will redirect you to plugin page again, search on PaySky - PayForm Gateway and click on Active
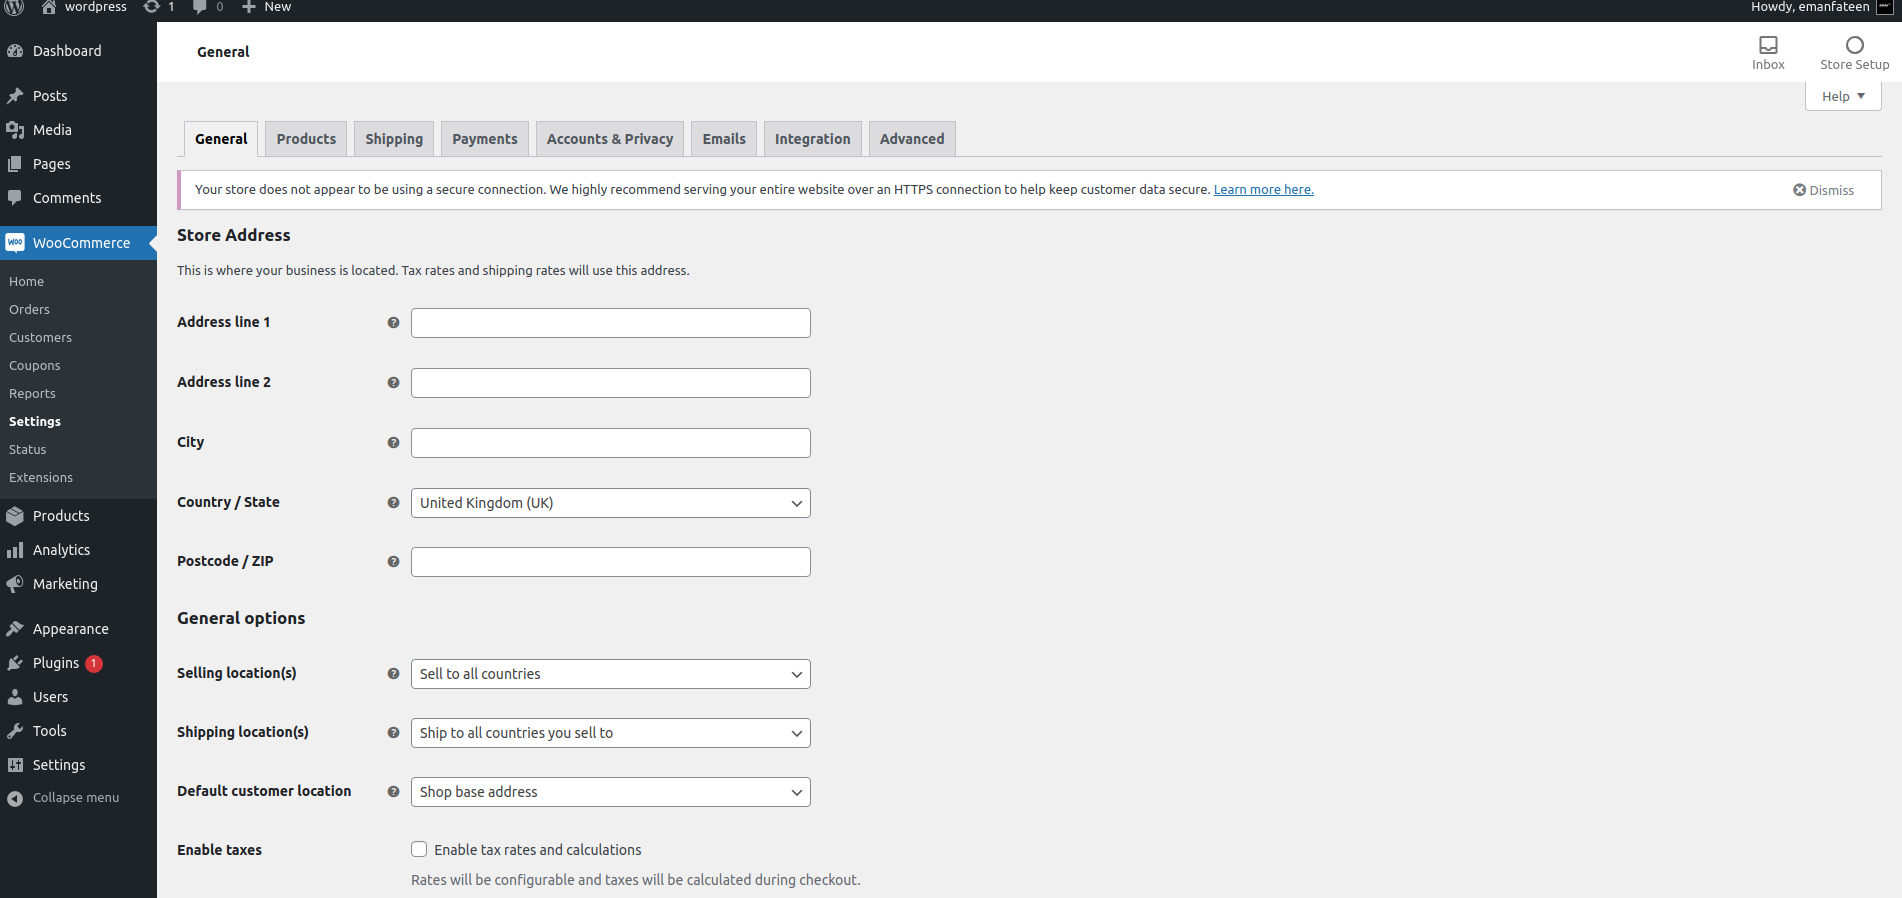
- Now go to WooCommerce menu and choose settings
- choose payment tab and search for pay ( PaySky PayForm ) and togell the button of Enabled
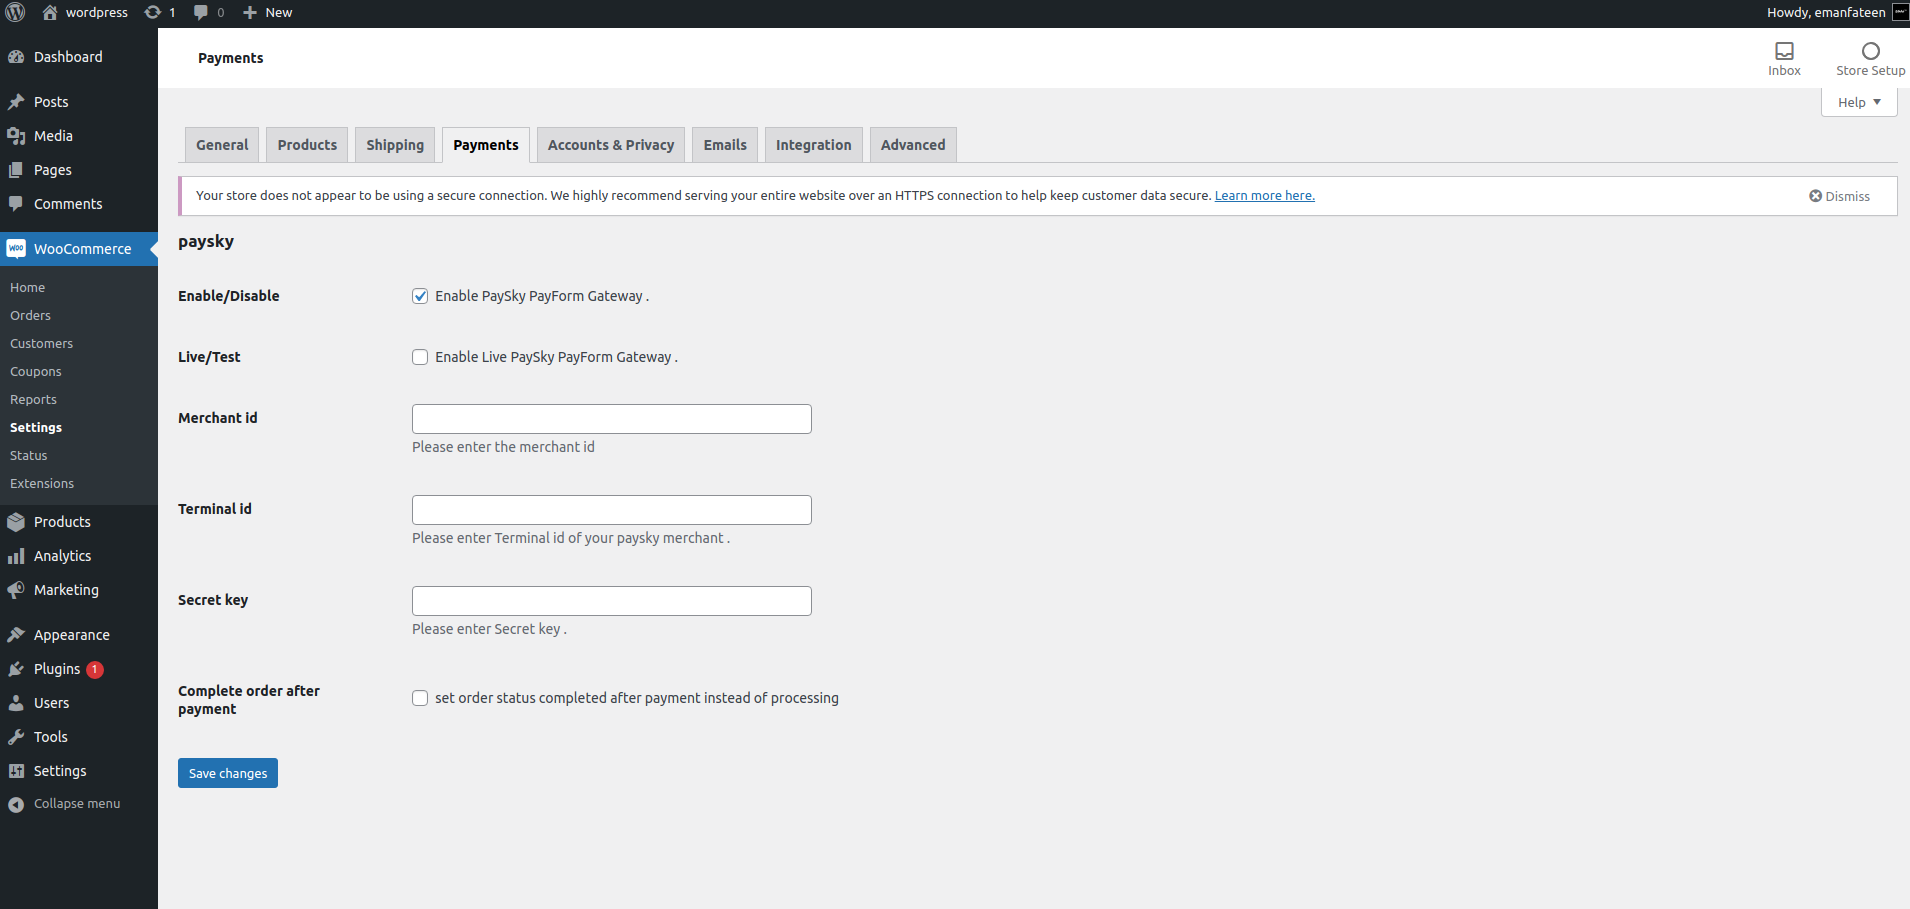
- Click on setup button of pay ( PaySky PayForm ) to enter your credentials
- And now we are Done your wordpress website has been ready to use Paysky Plugin
Introduction #
Purpose of Document #
The purpose of this document is to specify how to use Paysky Plugin with wordpress
Prerequisites #
In order to start integration with paysky plugin with wordpress you need to install woocommerce plugin to your wordpress website also you need to obtain the following Data:
- UPG Merchant ID: your unique identifier on UPG
- UPG Terminal ID: ID of the acceptance interface with different acceptance channels enabled/disabled (Card and Digital QR)
- Secure hash
At the top of the page click on Upload plugin #
Click on choose File and browse on the paysky.zip file
Do not forget we need to upload paysky plugin as compressed file not as a folder #
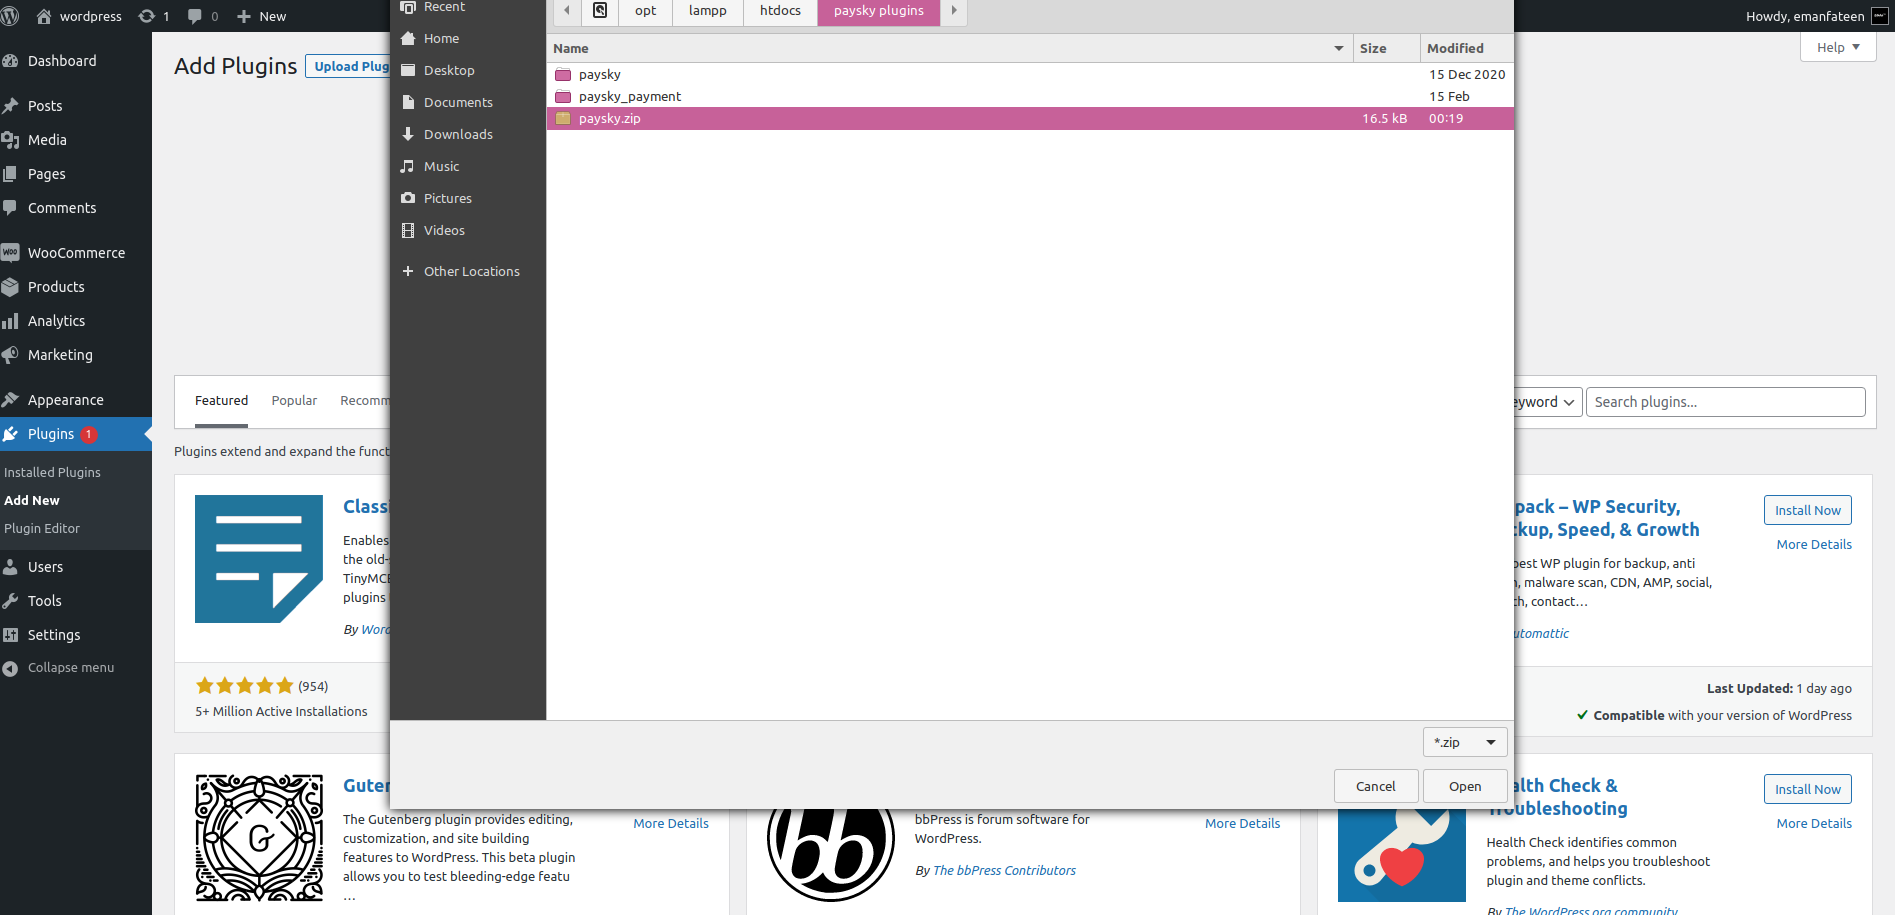
After upload the plugin click on Install now #

It will redirect you to plugin page again, search on PaySky – PayForm Gateway and click on Active #
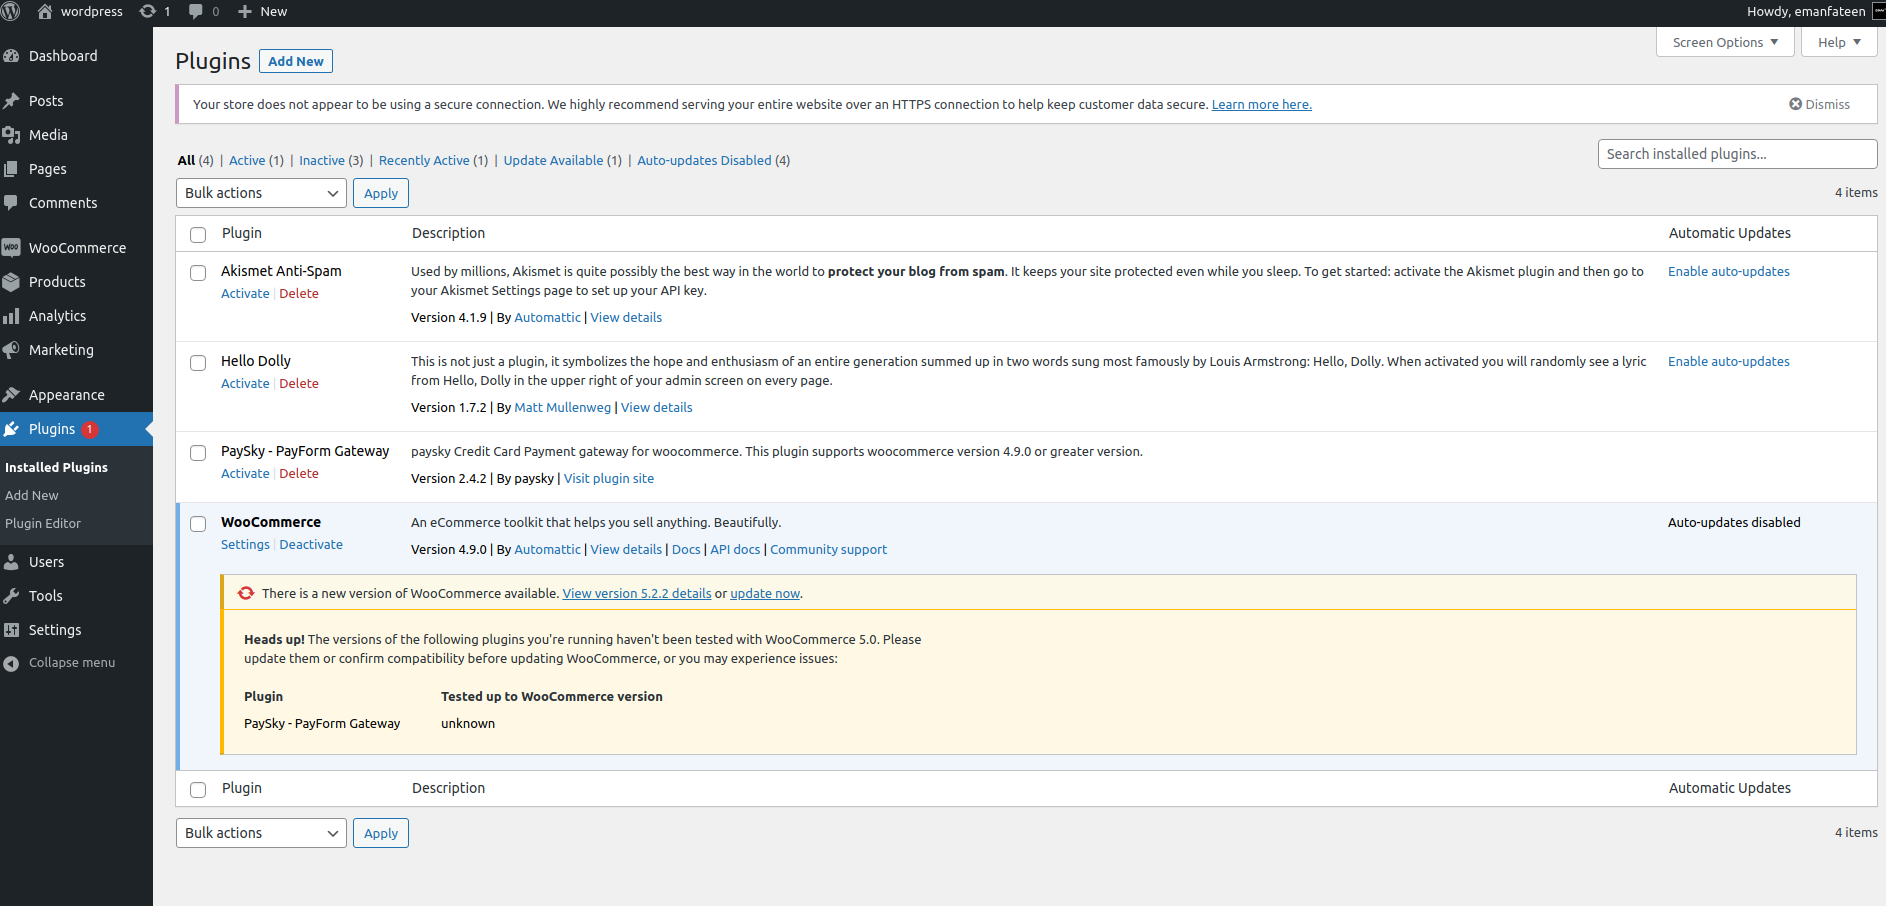
Now go to WooCommerce menu and choose settings
#
choose payment tab and search for pay ( PaySky PayForm ) and togell the button of Enabled #
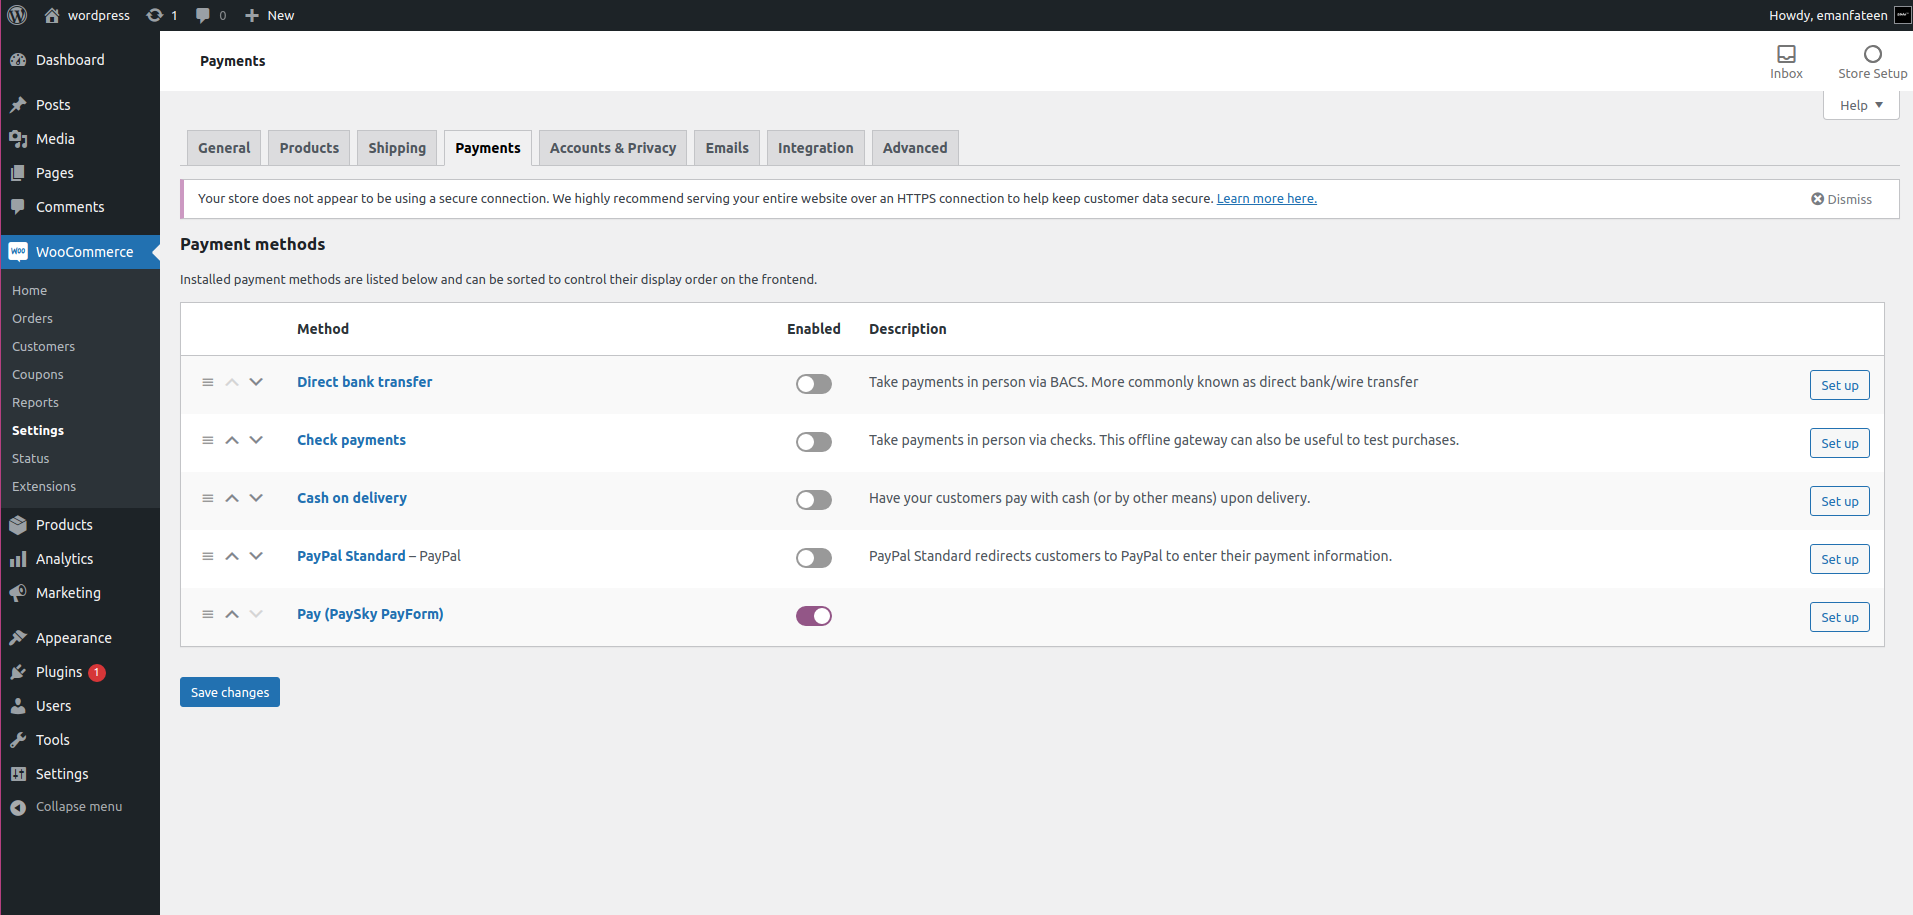
Click on setup button of pay ( PaySky PayForm ) to enter your credentials #
